Welcome to Moda Fabrics!
Countdown to Christmas: Holly Sprig
Countdown to Christmas: Holly Sprig

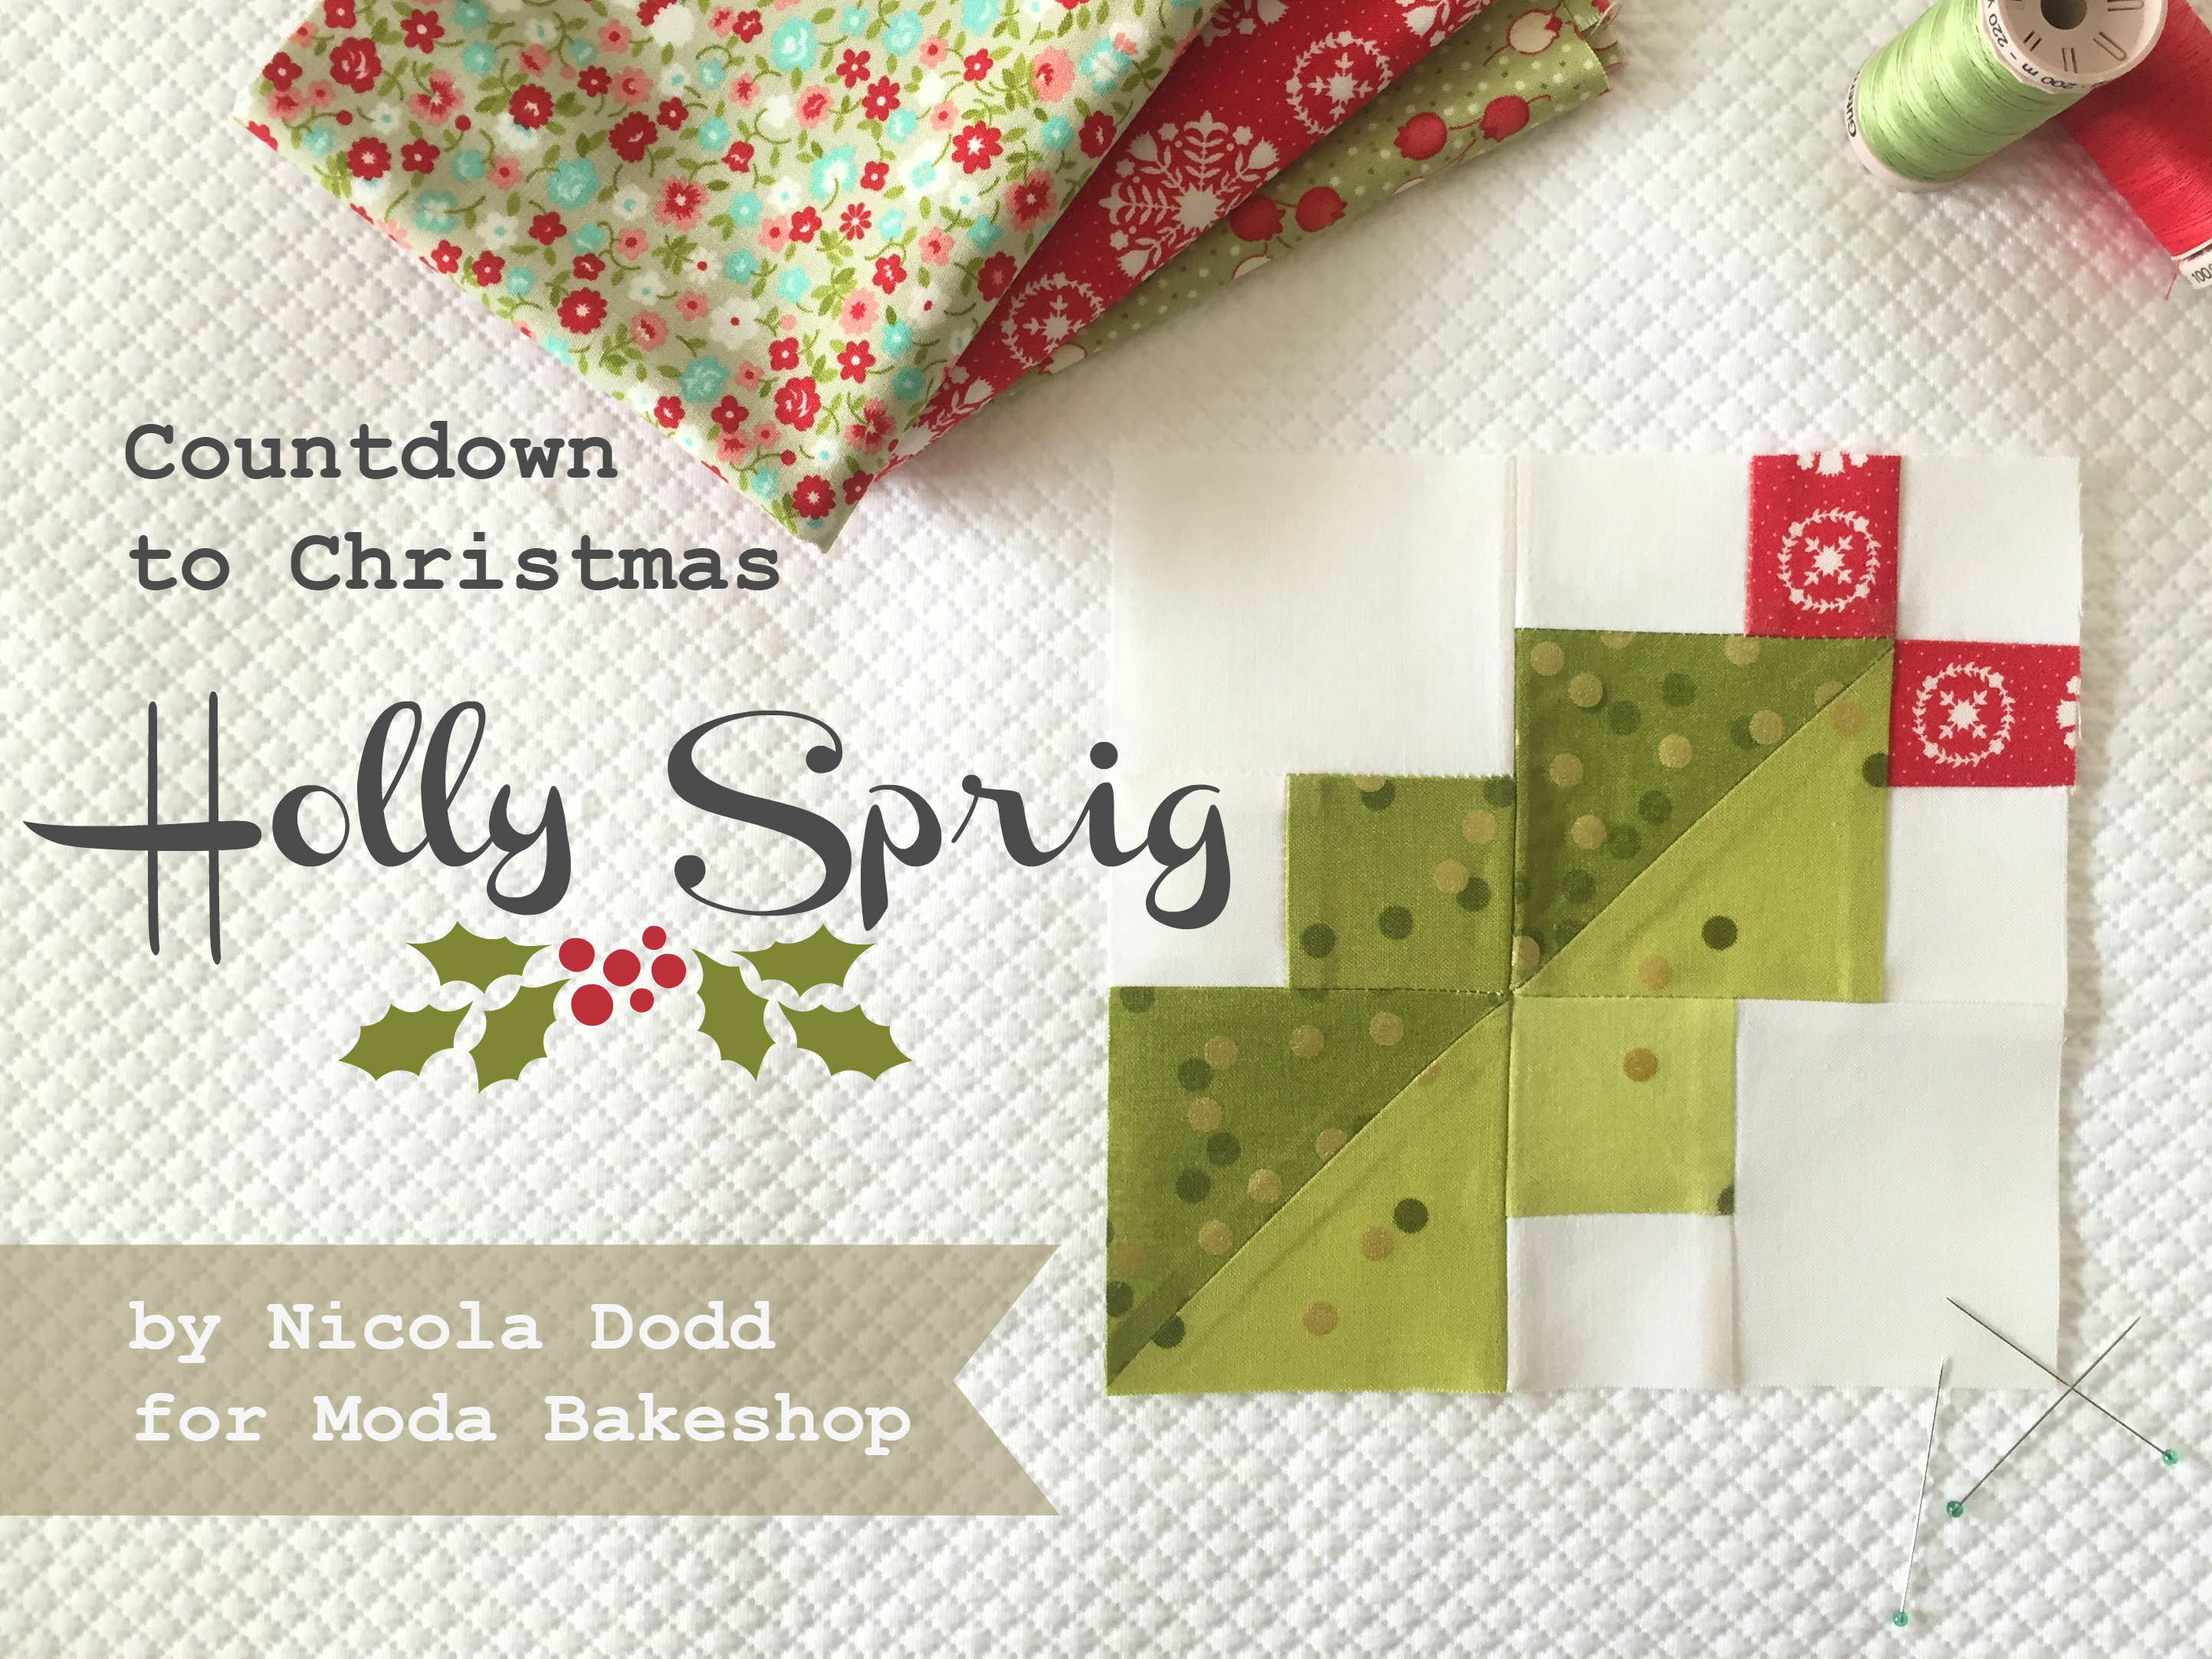
Hello lovely Moda Bakers! I'm Nicola Dodd from CakeStand Quilts and I'm so happy to be sharing a block in the Countdown to Christmas. I hope you've been enjoying the Bakeshop's unique advent calendar: hasn't it been wonderful to be treated to a new block every day? So much better for you than chocolates!!
My block is inspired by a traditional sprig of Holly. We are lucky to have lots of beautiful Holly bushes in our garden which I cut every year to decorate the house. It wouldn't be Christmas without it!
If you want to make a whole bunch of Holly Sprigs I have some ideas at the end of this post...

(1) 3½” square and (1) 2” square of light green fabric* {Confetti Metallic Ombre in Lime}
(1) 3½” square and (1) 2” square of dark green fabric* {Confetti Metallic Ombre in Lime}
(2) 1½” squares of red fabric {Vintage Holiday Olivia in red}
(2) 2½” x 3” pieces, (4) 1½” x 2” pieces and (1) 1½” square of white fabric {Bella Solid 98}

Please read through the pattern before you begin, assuming a 1⁄4” seam allowance and a fabric width (WOF) of 42”. I would always recommend making a test block.
1. Mark a diagonal line on the back of the light green 3½”” square and pin - right sides together - to a dark green 3½””square (a). Stitch ¼” away from each side of your marked line (b), cut along that line and press the two Half Square Triangles (HSTs) open towards the dark green fabric. You can press your seam open if you prefer.
2. Trim the HSTs to 3” square (c). {I do this by marking a 3” square where the 45º degree line meets the corner of my ruler with washi (low tack) tape.} EDITED: thank you Bruce!
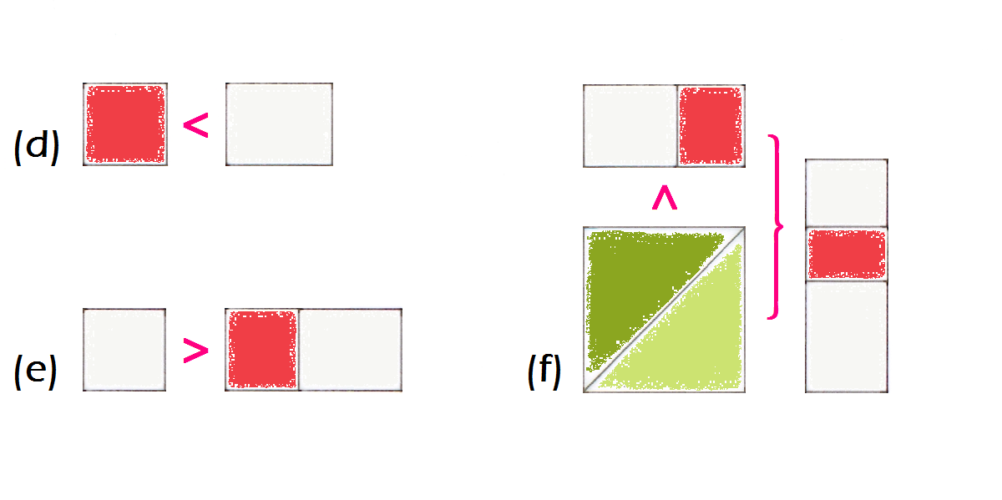
3. Join a 1½” x 2” white piece to a 1½” red square (d), pressing towards the red. MAKE 2
4. Join the 1½” white square to one of the Berry units (e), again pressing towards the red.
5. Join the Berry units to one of the HSTs – the top first and then the side – taking care with the placement (f) and pressing as directed (>).
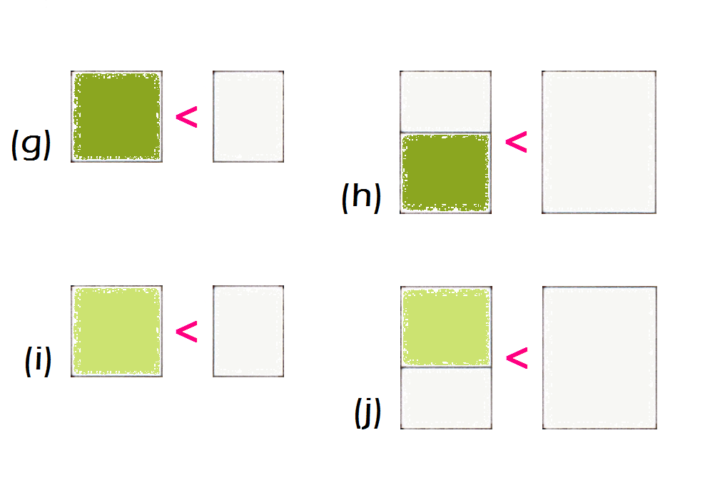
6. Join a 1½” x 2” white piece to a 2” dark green square (g), then join a 2½” x 3” white piece (h), taking care with the placement.
7. Repeat step 6 with the 2" light green square REVERSING THE PLACEMENT (i & j).
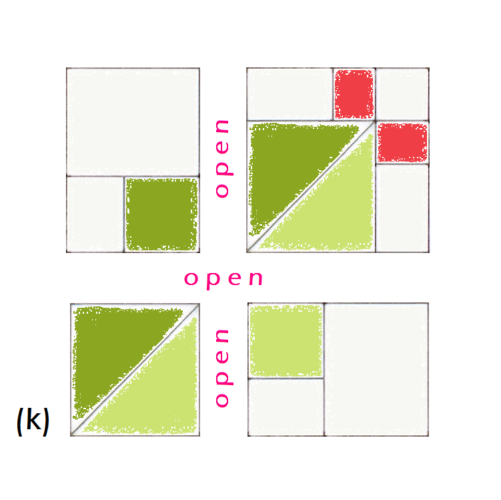
8. To assemble the block, join the three pieced units and the remaining HST in two rows of two (k), pressing the seams open.

One 6½" square block (6" finished size when sewn into your project).
If you decide to make a bunch of Holly Sprig blocks, the asymmetrical design creates some interesting effects. I combined four to make a pretty Christmas Wreath. There's a fun tutorial for the cushion I made with my blocks on my blog, here. We rarely have snow here in Shropshire, but I was delighted to wake up to a snowy garden on the morning I took my photo...
Make a few more and they can border a table runner, which re-imagines my Gothic Gatehouse block as a gingerbread cottage, framed by little fir trees (there's a tutorial for those on my blog too, here). Or use them in vertical bands on a classic strippy quilt. I'm looking forward to seeing how you use yours, so be sure to come and say hello on Instagram and share what you're sewing this winter! Whatever the weather where you are, I'm sending you the warmest of wishes for a very merry Christmas and a happy New Year,
Nicola xx


Comments